Step-by-Step Guide to Replacing Tractor Tires

Tractor tires are essential components of agricultural machinery, providing traction, stability, and support for various farming tasks. Over time, tractor tires may wear out or sustain damage, necessitating replacement to ensure optimal performance and safety. While replacing tractor tires may seem daunting, following a step-by-step guide can simplify the process and help you complete the task efficiently. In this article, we’ll provide a comprehensive tractor tire replacement guide and walk you through the process of changing tractor tires, whether you’re a farmer in Sheridan Lake, Colorado, or anywhere else.

Assessing Tire Condition

Before replacing tractor tires, it’s essential to assess their condition and determine whether replacement is necessary. Look for signs of wear, such as tread depth, sidewall damage, bulges, cracks, or punctures. Additionally, check tire pressure and inflation levels to ensure they meet manufacturer specifications. If tires show significant wear or damage, it’s time for replacement.

Gathering Necessary Tools and Materials

To replace tractor tires, gather the following tools and materials:

Tools:

  • Jack
  • Lug wrench
  • Tire iron
  • Pry bar
  • Tire gauge

Materials:

  • Replacement tires
  • Tire lubricant or soap solution
  • Tire valve stems
  • Valve stem core tool
  • Rim protectors (optional)

Removing the Old Tire

  1. Safety Precautions: Park the tractor on a level surface, engage the parking brake, and turn off the engine. Place wheel chocks behind the rear wheels to prevent movement.
  2. Loosening Lug Nuts: Use a lug wrench to loosen the lug nuts on the wheel hub.
  3. Raising the Tractor: Position a hydraulic jack under the axle housing or frame near the tire you’re replacing. Carefully lift the tractor until the tire is off the ground.
  4. Removing the Lug Nuts: Fully remove the lug nuts and set them aside in a safe place.
  5. Breaking the Bead: Use a tire iron or pry bar to break the bead seal between the tire and the rim. Work your way around the tire to loosen it from the rim.

Installing the New Tire

  1. Applying Lubricant: Apply a liberal amount of tire lubricant or soap solution to the tire bead and rim to ease installation.
  2. Positioning the Tire: Align the new tire with the rim, ensuring that the valve stem aligns with the valve hole in the rim.
  3. Mounting the Tire: Use a tire iron or pry bar to gradually work the tire onto the rim, starting from the opposite side of the valve stem. Take care not to pinch the tire tube or damage the rim.
  4. Inflating the Tire: Inflate the tire to the recommended pressure using a tire gauge and air compressor. Check the manufacturer’s specifications for proper inflation levels.
  5. Seating the Bead: Inflate the tire until the bead seats securely against the rim. You may hear a popping sound as the bead snaps into place.
  6. Checking for Leaks: Spray soapy water onto the tire bead and valve stem to check for leaks. If bubbles form, the tire may not be seated correctly, or the valve stem may be leaking.

Reattaching the Wheel

  1. Lowering the Tractor: Carefully lower the tractor back onto the ground using the hydraulic jack.
  2. Tightening Lug Nuts: Reattach the lug nuts to the wheel hub and tighten them securely using a lug wrench. Follow a star pattern to ensure even tightening.
  3. Testing the Tire: Test the newly installed tire by driving the tractor at low speeds in a safe area. Listen for unusual noises and monitor tire pressure to ensure proper seating and inflation.

Conclusion

Replacing tractor tires is a manageable task that can be completed with basic tools and equipment. By following this step-by-step guide, you can confidently change tractor tires and maintain your agricultural equipment’s performance and safety. Whether you’re a farmer in Sheridan Lake, Colorado, or elsewhere, regular tire maintenance and replacement are essential for ensuring optimal traction, stability, and efficiency in your farming operations. Remember to prioritize safety and consult manufacturer guidelines for specific tire replacement procedures. With proper care and maintenance, your tractor tires will continue to support your farming activities for years to come.

Need Repair Services in Sheridan Lake, CO?

Welcome to Thunderbird Petroleum! We are a family-owned business that has been serving the heart of Sheridan Lake, CO since 2006. We offer a wide range of parts and services, from routine maintenance to minor diagnostics and repairs. We have a large inventory of auto, truck, and agricultural tires as well. And don’t forget the gas! We also offer oil-fired furnaces – both new and previously owned. From troubleshooting, repair services, and the parts needed to ensure your furnace stays in top condition, our team is committed to satisfying all of our customers. Contact us today to speak with a friendly member of our staff!

Top 5 DIY Auto Maintenance Tasks Every Car Owner Should Know

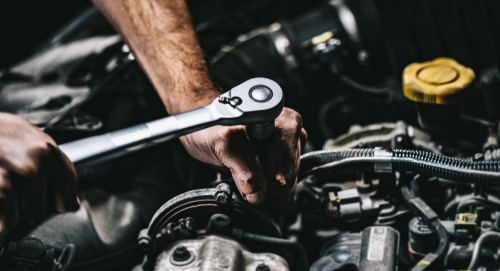
Auto,mechanic,working,on,car,engine,in,mechanics,garage.,repair

As a car owner, it’s crucial to stay on top of regular maintenance tasks to ensure the longevity and performance of your vehicle. While some maintenance tasks may require a visit to the local auto shop or auto repair center in Sheridan Lake, CO, there are several simple DIY tasks that every car owner should know how to do. By learning how to perform these maintenance tasks yourself, you can save time and money in the long run. In this blog post, we will discuss the top 5 DIY auto maintenance tasks that every car owner should know.

1. Changing the Oil

One of the most important maintenance tasks for your car is changing the oil regularly. Oil lubricates the engine and helps to prevent wear and tear on the moving parts. To change the oil in your car, you will need a few basic tools such as an oil filter wrench, a funnel, and a drain pan. Start by lifting the car with a jack and locating the oil drain plug underneath the car. Place the drain pan underneath the plug and remove it to drain the old oil. Once the oil has drained completely, replace the drain plug and remove the old oil filter. Install a new oil filter, add new oil to the engine through the oil filler cap, and you’re good to go!

2. Checking the Tire Pressure

Proper tire pressure is essential for the safety and performance of your vehicle. Underinflated tires can increase fuel consumption and cause uneven wear on the tires. To check the tire pressure, you will need a tire pressure gauge. Remove the valve cap from the tire and press the gauge onto the valve stem to get a reading. Compare the reading to the recommended pressure listed in your owner’s manual or on the sticker inside the driver’s side door jamb. If the pressure is too low, use an air compressor to fill the tire to the correct pressure. Repeat this process for all four tires, including the spare tire.

3. Replacing the Air Filter

The air filter in your car plays a crucial role in preventing dirt and debris from entering the engine. A dirty air filter can restrict airflow and reduce engine performance. To replace the air filter, locate the air filter box under the hood of your car. Open the box and remove the old air filter. Check the condition of the filter – if it is dirty or clogged, replace it with a new one. Make sure to install the new filter in the correct orientation and close the air filter box securely. A clean air filter will help your engine breathe easier and improve fuel efficiency.

4. Checking and Topping Off Fluids

Your car relies on several fluids to operate smoothly, including coolant, brake fluid, power steering fluid, and windshield washer fluid. Regularly checking these fluids and topping them off as needed is essential for the proper functioning of your vehicle. To check the fluid levels, locate the reservoirs for each fluid under the hood of your car. Remove the cap of each reservoir and check the fluid level against the markings on the side of the reservoir. If any fluid is low, add more until it reaches the correct level. Be sure to use the correct type of fluid for each reservoir to prevent damage to your car’s systems.

5. Inspecting and Replacing Wiper Blades

Wiper blades play a crucial role in maintaining visibility and safety while driving in inclement weather. Over time, wiper blades can become worn or cracked, reducing their effectiveness. To inspect your wiper blades, lift the wiper arms off the windshield and examine the condition of the rubber blade. If you notice any signs of wear or damage, it’s time to replace the wiper blades. To replace the blades, simply lift the old blades off the wiper arms and install new ones in their place. Make sure the new blades are secure and functioning properly before using them on the windshield.

Summary

As a car owner in Sheridan Lake, CO, it’s important to know how to perform basic maintenance tasks on your vehicle. By learning how to change the oil, check tire pressure, replace the air filter, top off fluids, and inspect wiper blades, you can keep your car running smoothly and avoid costly repairs down the road. While some maintenance tasks may still require a visit to the auto shop or auto repair center, knowing how to perform these DIY tasks can save you time and money in the long run. So, roll up your sleeves, grab your tools, and get ready to tackle these top 5 DIY auto maintenance tasks every car owner should know.

Need an Auto Shop in Sheridan Lake, CO?

Welcome to Thunderbird Petroleum! We are a family-owned business that has been serving the heart of Sheridan Lake, CO since 2006. We offer a wide range of parts and services, from routine maintenance to minor diagnostics and repairs. We have a large inventory of auto, truck, and agricultural tires as well. And don’t forget the gas! We also offer oil-fired furnaces – both new and previously owned. From troubleshooting, repair services, and the parts needed to ensure your furnace stays in top condition, our team is committed to satisfying all of our customers. Contact us today to speak with a friendly member of our staff!